There is nothing quite like the comfort of a freshly baked cookie. Growing up in New England, the smell of warm spices and sweet dough often filled my grandmother's kitchen. Those memories are so dear to me. Sometimes, though, you do not have the time for a full batch of cookies. Sometimes you just need a little sweet something, and you need it right now.
That is where this incredibly easy microwave mug cookie recipe comes into play. It has become a cherished go-to in my own home. This recipe brings that same cozy, warm feeling without all the fuss. It is perfect for a quiet evening treat or a quick pick-me-up.
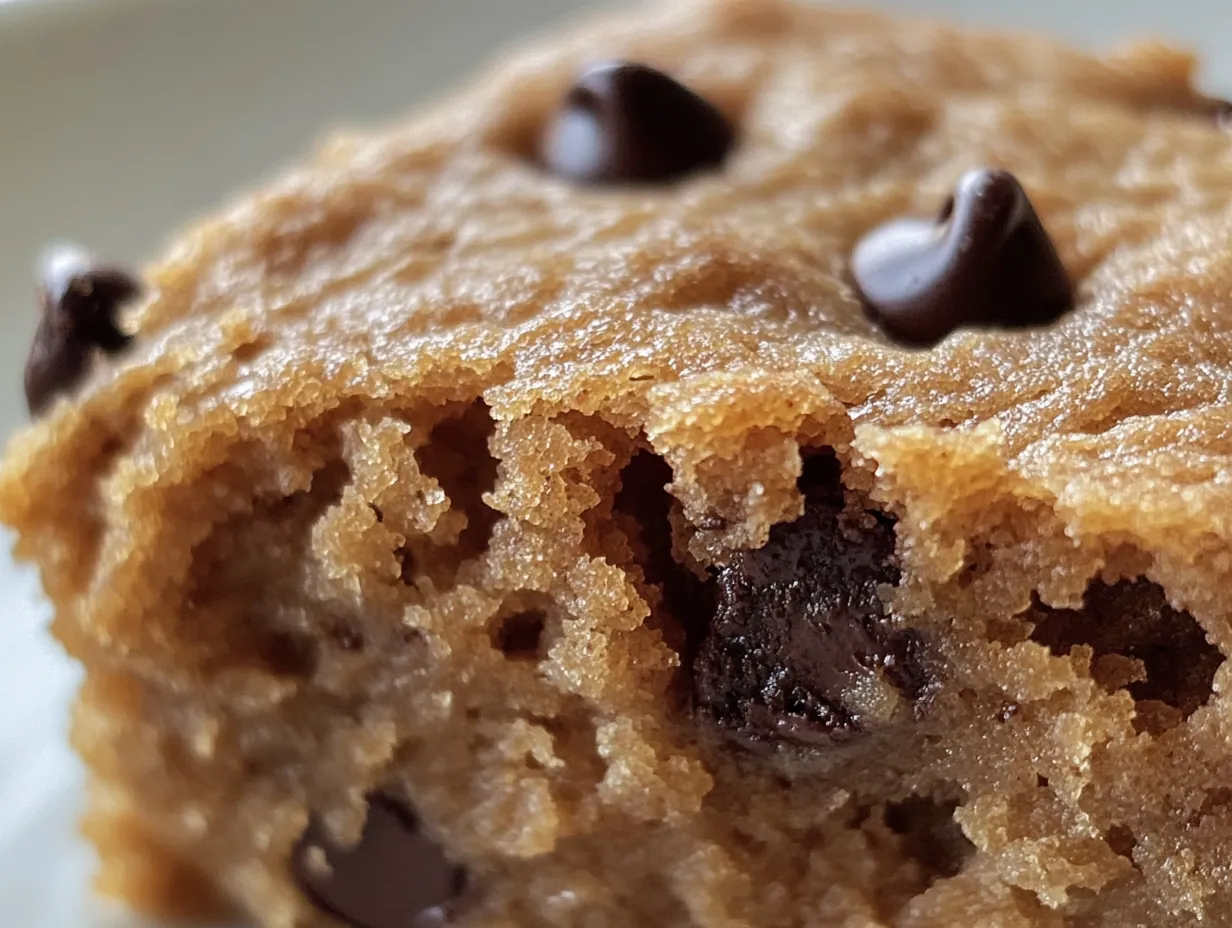
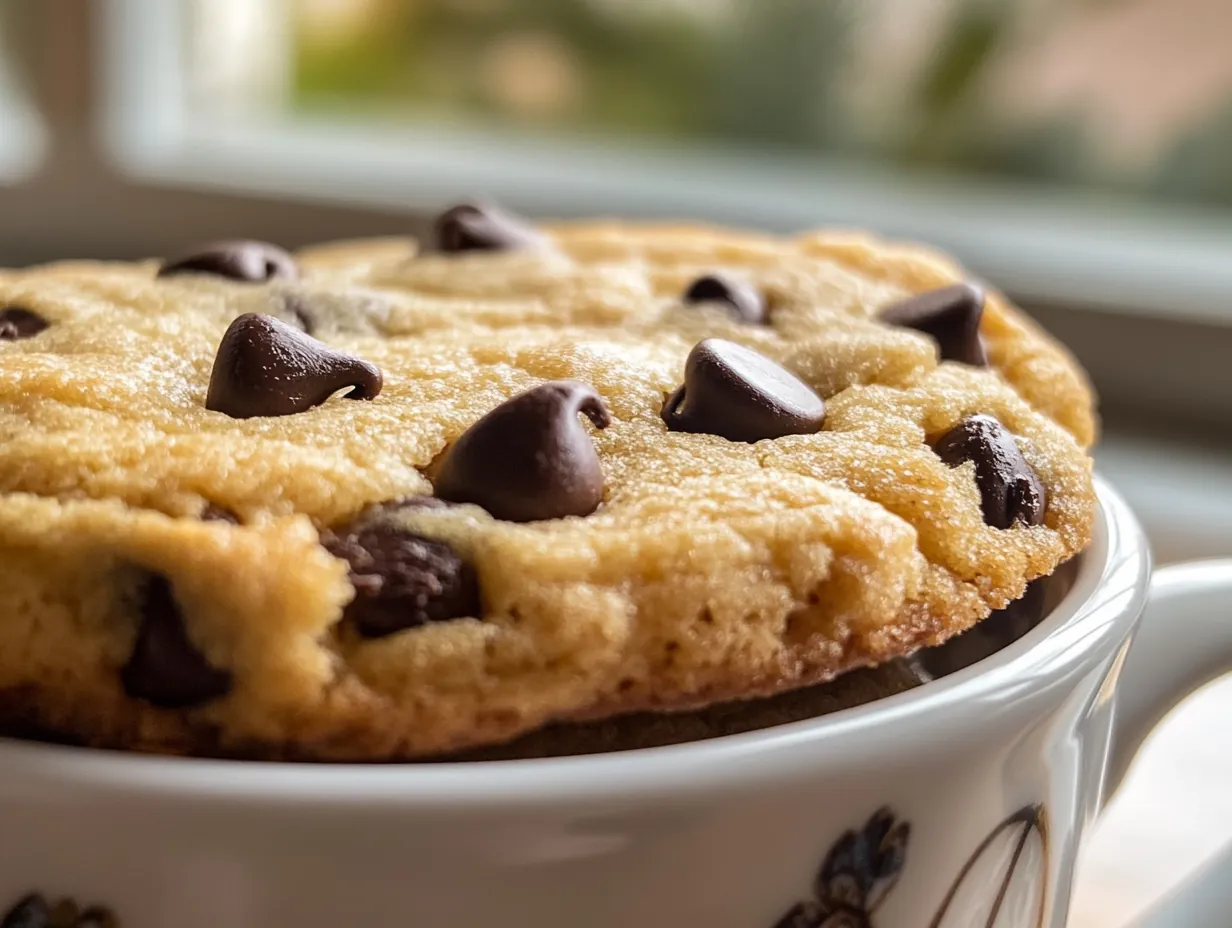
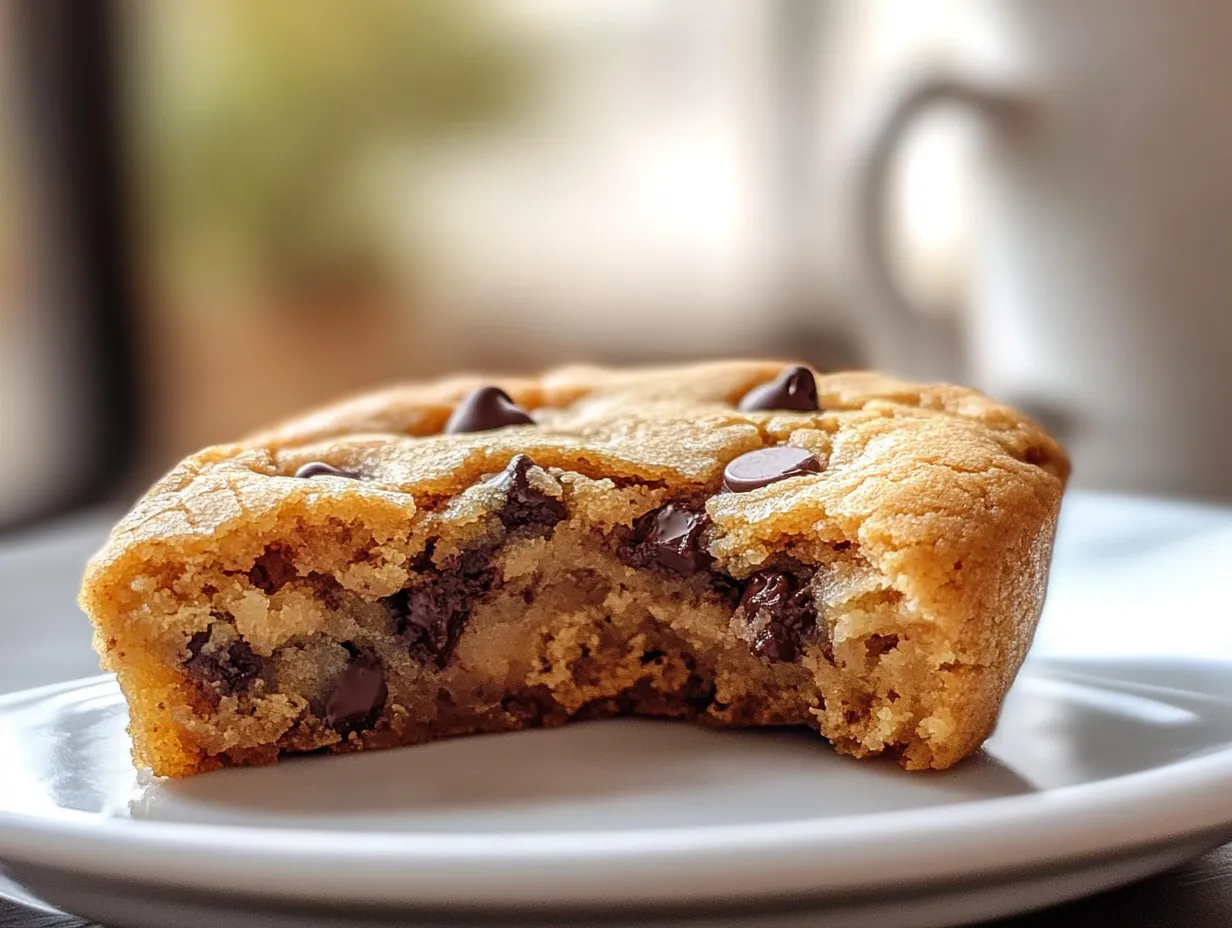
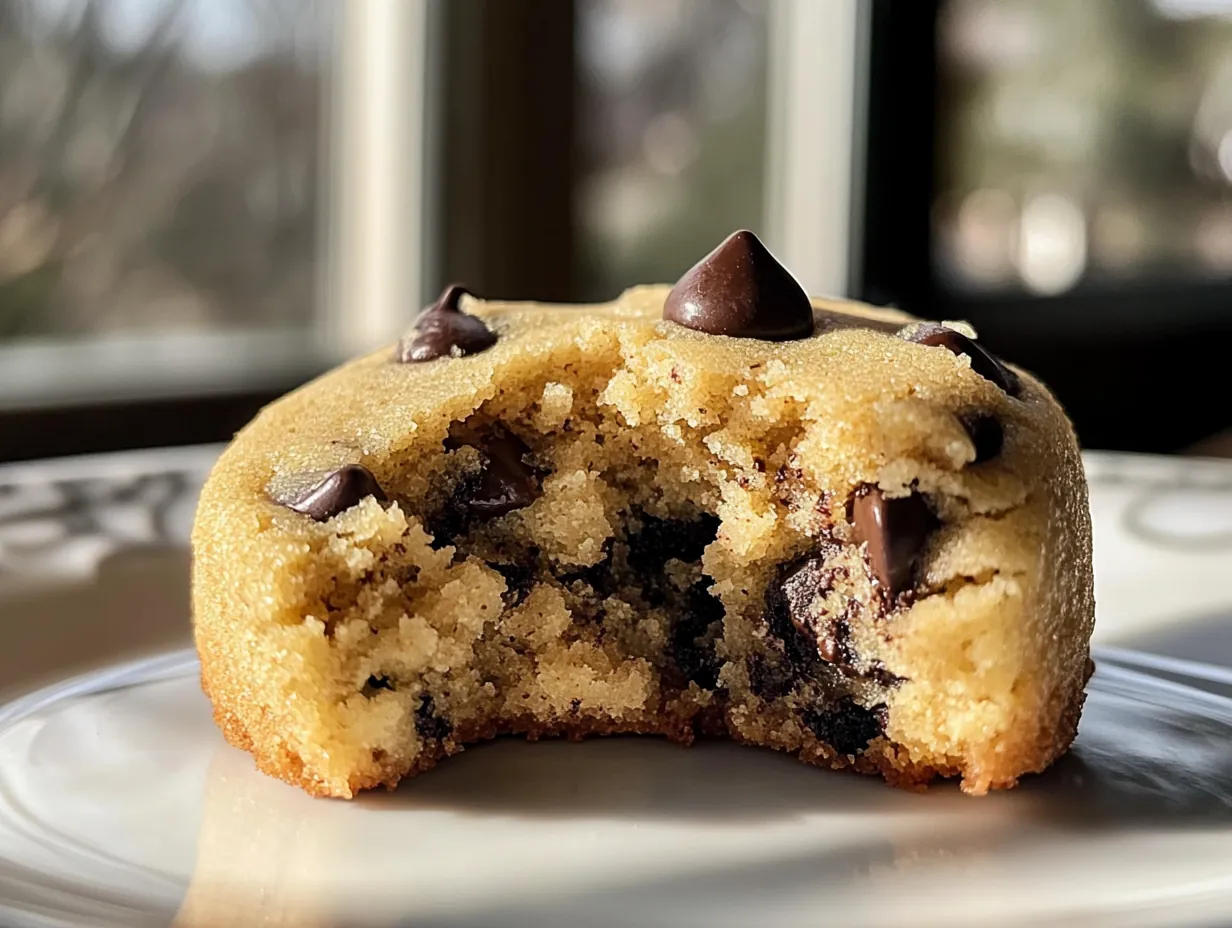
This mug cookie is more than just a quick dessert. It is a little moment of pure joy. It lets you create something delicious and comforting with minimal effort. Imagine sinking your spoon into a warm, soft cookie, studded with melty chocolate chips, all made in your favorite mug. It truly is a little bit of magic.
Simple Essentials for Your Perfect Mug Cookie
Gathering your ingredients for this easy mug cookie is a breeze. You likely have most of these pantry staples already on hand. This is part of what makes this recipe so wonderful for those sudden dessert cravings. Fresh, quality ingredients always make the best treats.
- 2 tablespoons unsalted butter, melted
- 2 tablespoons granulated sugar
- 2 tablespoons light brown sugar, packed
- 1 large egg yolk (save the white for another recipe!)
- 1/4 teaspoon vanilla extract
- 6 tablespoons all-purpose flour
- 1/4 teaspoon baking powder
- Pinch of salt
- 2 tablespoons chocolate chips (semi-sweet or your favorite)
- Optional: 1 tablespoon milk (if dough seems too dry)
Unsalted Butter: Using unsalted butter allows you to control the salt content in your cookie. It also provides rich flavor and moisture. Melted butter helps create that soft, chewy texture we all love. If you only have salted butter, reduce the pinch of salt in the recipe to a tiny dash. You can also substitute with an equal amount of melted coconut oil or vegetable oil for a dairy-free option. The flavor will be slightly different but still delicious.
Light Brown Sugar: This ingredient is key for moisture and chewiness. Brown sugar contains molasses, which contributes to a softer cookie and a lovely caramel-like flavor. Always make sure to pack your brown sugar tightly when measuring. If you do not have light brown sugar, you can use all granulated sugar. Your cookie will be a bit crispier. Alternatively, you can make your own by mixing 1 cup of granulated sugar with 1 tablespoon of molasses.
Egg Yolk: The egg yolk is a secret weapon for a truly rich and chewy mug cookie. It adds fat and emulsification without the extra liquid and protein from the egg white, which can make the cookie cakey. Using just the yolk keeps the cookie dense and fudgy. If you absolutely cannot separate an egg, you can use a small whole egg. Just be aware that the texture might be slightly lighter and more cake-like.
Whipping Up Your Quick Mug Cookie Treat
Get ready to create some delicious magic in your kitchen. This process is so simple and rewarding. You will have a warm, gooey cookie in your hands in just a few minutes.
- First, grab your favorite microwave-safe mug. Add the two tablespoons of unsalted butter to the mug. Microwave it on high for about 20-30 seconds, or until the butter is fully melted. Be careful not to let it brown or burn.
- Carefully remove the mug from the microwave. Add both the granulated sugar and the packed light brown sugar to the melted butter. Stir these ingredients together very well with a small spoon or fork until they are fully combined. The mixture should look slightly pasty.
- Next, stir in the single large egg yolk and the vanilla extract. Mix vigorously for about 30 seconds. You want the mixture to become light in color and smooth. This step incorporates air and helps create a tender cookie.
- Now it is time for the dry ingredients. Add the all-purpose flour, baking powder, and pinch of salt directly into the mug with the wet mixture. Stir gently until just combined. Be careful not to overmix the dough. Overmixing can lead to a tough cookie.
- Fold in the chocolate chips. You can use semi-sweet, milk, or dark chocolate chips. Stir them in just enough so they are evenly distributed throughout the dough. If your dough seems too thick or dry at this point, you can add a tablespoon of milk to loosen it slightly.
- Place the mug back into the microwave. Cook on high for 60-90 seconds. Cooking times can vary widely depending on your microwave's wattage. Start with 60 seconds and check for doneness. The edges should look set, but the center can still be slightly soft and gooey.
- Carefully remove the hot mug from the microwave. Let the cookie cool in the mug for at least 2-3 minutes before enjoying. This cooling time allows the cookie to set up properly and prevents you from burning your mouth.
Sweet Swaps and Delicious Additions
One of the best things about this simple mug cookie recipe is how easily you can customize it. Think of this recipe as a wonderful canvas for your own culinary creativity. Do not be afraid to experiment with different flavors and textures.
My Creative Touch:
- Peanut Butter Chocolate Chip: For all the peanut butter lovers out there, simply add 1-2 tablespoons of creamy peanut butter to the melted butter and sugar mixture in step two. Mix it in thoroughly before adding the egg yolk. This creates a wonderfully rich and nutty cookie. Top with a few extra peanut butter chips or a drizzle of melted peanut butter after cooking for an extra indulgent treat.
- Oatmeal Raisin Spice: Transform your mug cookie into a classic with this warm variation. Add 1 tablespoon of quick oats and 1/4 teaspoon of ground cinnamon to the dry ingredients. Fold in 1-2 tablespoons of raisins along with the chocolate chips. This gives you a comforting, chewy cookie reminiscent of a homemade oatmeal raisin cookie, perfect with a cup of tea.
Gourmet Pairings:
- Drink: A tall glass of cold milk is the absolute classic pairing for any chocolate chip cookie. The cool, creamy milk perfectly balances the warm, sweet cookie. For a grown-up treat, a hot cup of coffee or a comforting Earl Grey tea also complements the flavors beautifully.
- Side Dish: A scoop of vanilla bean ice cream is a non-negotiable indulgence with a warm mug cookie. The cold, melting ice cream creates an incredible contrast with the hot cookie. A dollop of whipped cream or a few fresh berries could also provide a lovely counterpoint to the cookie's richness.
Keeping Your Cozy Cookie Fresh
While this mug cookie is truly best enjoyed immediately, sometimes you might have a tiny bit left over, or you might want to prepare elements in advance. Here is how to handle storage for the best results.
Storage: A fully baked mug cookie is best eaten within a few hours of making it. If you have any leftovers, cover the mug tightly with plastic wrap or transfer the cookie to an airtight container. Store it at room temperature for up to one day. It will lose some of its initial warmth and gooeyness, but it will still be a pleasant treat. For longer storage of a baked cookie, you can place it in the refrigerator for up to two days. Reheat gently before eating.
Freezing: Freezing a fully baked mug cookie is not recommended as the texture can become quite dry and crumbly upon thawing. However, you can prepare the cookie dough in advance. Mix all ingredients up to the point of cooking, then transfer the dough to a small freezer-safe container or wrap it tightly in plastic wrap. Freeze for up to one month. When you are ready for a cookie, thaw the dough in the refrigerator overnight or at room temperature for an hour. Then, transfer it to a mug and microwave as directed.
Reheating: If you have a leftover baked mug cookie from the refrigerator, the best way to reheat it is in the microwave. Place the cookie, still in its mug or on a microwave-safe plate, into the microwave. Heat on high for 15-30 seconds, or until it is warmed through and soft again. Be careful not to overheat it, as this can dry out the cookie. Enjoy it warm and gooey once more!
Your Mug Cookie Questions Answered
I get a lot of questions about making the perfect mug cookie. This quick dessert is so popular for a reason! Here are some of the most common inquiries to help you master this simple pleasure.
Can I use a whole egg instead of just the yolk?
Yes, you can certainly use a whole small egg if separating an egg yolk feels like too much fuss. However, using only the egg yolk contributes significantly to the chewy, fudgy texture that makes this mug cookie so delightful. A whole egg might make your cookie slightly more cake-like in texture, but it will still be delicious and moist.
How do I know when my microwave mug cookie is perfectly cooked?
The key to a perfectly cooked mug cookie is to watch it closely. The edges of the cookie should appear set and firm, while the center should still look slightly soft and gooey. It will continue to set as it cools for a few minutes outside the microwave. If it looks very wet in the center, cook for an additional 10-15 seconds. Err on the side of slightly undercooked for a gooier result.
Can I make the dough for this mug cookie in advance?
Absolutely! You can prepare the cookie dough ahead of time. Mix all the ingredients as directed up to the point of microwaving. Then, cover the mug tightly with plastic wrap and store it in the refrigerator for up to 24 hours. When you are ready for a warm treat, simply remove it from the fridge and microwave as instructed. This is perfect for meal prepping a quick dessert.
And there you have it, friends! A warm, gooey, utterly satisfying microwave mug cookie, ready in just minutes. This little recipe holds such a special place in my heart because it proves that comfort and deliciousness do not always require a lot of time or effort. Sometimes, the simplest things bring the greatest joy.
I truly hope this easy recipe becomes a beloved staple in your kitchen, just as it has in mine. Whether you are treating yourself to a quiet moment or surprising a loved one, this mug cookie delivers happiness in every spoonful. Do not be afraid to play with the variations. Make it your own special creation.
I love hearing about your kitchen adventures, so please share your mug cookie successes with me. What flavors did you try? Did you enjoy it with a scoop of ice cream? There is no wrong way to enjoy a warm, homemade cookie. Happy baking, my dears!
Reader Reviews
Made this for meal prep and it was incredible all week. The flavors actually got better the next day. Highly recommend!
The step-by-step instructions made this so easy to follow. Even my kids helped make it. A new family favorite for sure!
Absolutely stunning result for such a simple recipe. The instructions are clear and the outcome is restaurant-quality!
Tried this for the first time and it was a huge hit. The prep time was accurate and it smelled incredible while cooking.
Leave a Review