I remember summer evenings in my grandmother's New England kitchen. The air was thick with the scent of salty ocean breezes. It often carried the sweet perfume of ripening fruit. Grandmom always had a special dessert waiting for us. This no-bake banana split treat was a true standout. It felt like a party in a dish. It was a dessert that truly made our eyes sparkle.
This delightful dessert brings back so many happy memories for me. It perfectly captures that joyful, carefree feeling of childhood. My grandmother believed dessert should be simple to make. It also had to be utterly delicious. This recipe truly delivers on both promises. It is a fantastic way to celebrate any day. It is especially wonderful for family gatherings.
Imagine layers of creamy sweetness and bright, fresh fruit. It tastes like sunshine and happiness. This dessert does not require an oven. This makes it perfect for warm summer days. It is a wonderful option for backyard barbecues. You can prepare it ahead of time. This makes entertaining so much easier. Your guests will be amazed.
I love sharing this exact recipe with my own family now. Each bite feels like a warm, comforting hug. It connects me to those cherished moments from my past. It also creates new, precious memories with my children. This no-bake banana split dessert is a simple pleasure. It is a true testament to the magic of home cooking. Let us make some sweet, unforgettable memories together in your kitchen.
Unveiling the Wholesome Ingredients for Your No-Bake Banana Split
Gathering your ingredients is the joyful first step toward creating this magnificent dessert. Each item plays a vital role in building those irresistible layers of flavor and texture. This recipe uses simple, accessible ingredients you likely have or can easily find at your local market.
- 2 cups graham cracker crumbs
- 1/2 cup melted butter
- 1/4 cup granulated sugar
- 2 (8 oz) blocks cream cheese, softened
- 1 cup powdered sugar
- 1 teaspoon vanilla extract
- 1 (8 oz) whipped topping (like Cool Whip)
- 3–4 bananas, sliced (slightly firm works best)
- 1 (20 oz) can crushed pineapple, very well drained
- 1 cup strawberry pie filling or mashed sweetened strawberries
- 1–2 cups whipped topping
- Chocolate syrup (for drizzling)
- 1/2 cup chopped peanuts or walnuts
- Maraschino cherries
Ingredient Spotlight: Choosing Your Stars
Cream Cheese: Select full-fat cream cheese for the richest, creamiest texture. Softening it completely at room temperature is crucial for a lump-free, smooth filling. Avoid low-fat versions, as they can sometimes make the cream layer too watery or less stable. Its tanginess balances the dessert's sweetness beautifully.
Bananas: Opt for slightly firm, ripe bananas with minimal brown spots. Overly ripe bananas can become mushy quickly and might brown faster when sliced. Their natural sweetness and soft texture are essential. If you only have very ripe bananas, use them immediately after slicing for assembly.
Crushed Pineapple: Draining the crushed pineapple very well is absolutely non-negotiable. Excess liquid will make your dessert watery and prevent it from setting properly. Press it firmly against a sieve to extract every drop. This fruit layer adds a delightful bright, tangy contrast.
Crafting Your Heavenly No-Bake Banana Split Delight
Let us dive into the fun process of assembling this magnificent no-bake dessert. Each step is straightforward and builds upon the last, leading to a truly stunning creation. Take your time and enjoy the simple pleasure of layering these wonderful ingredients.
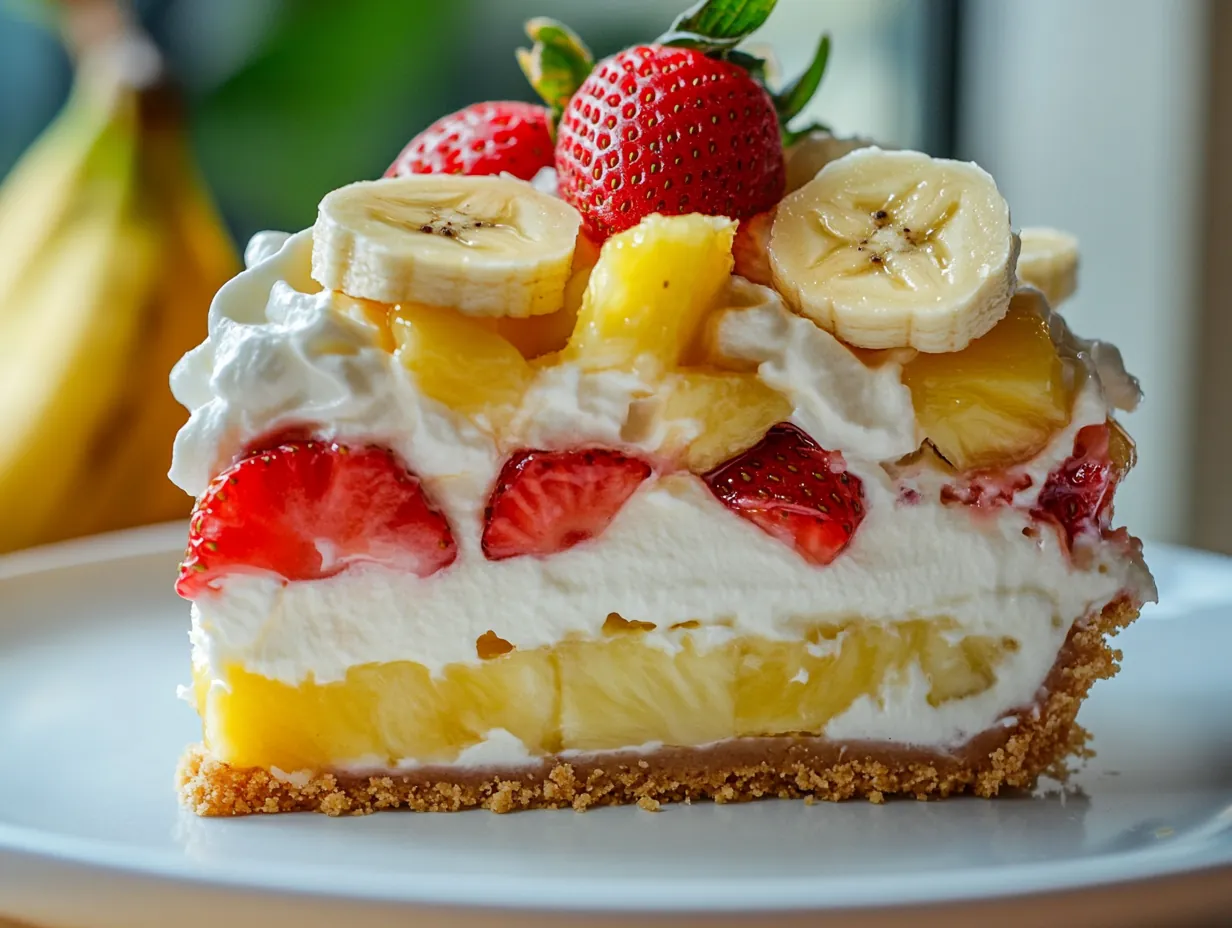
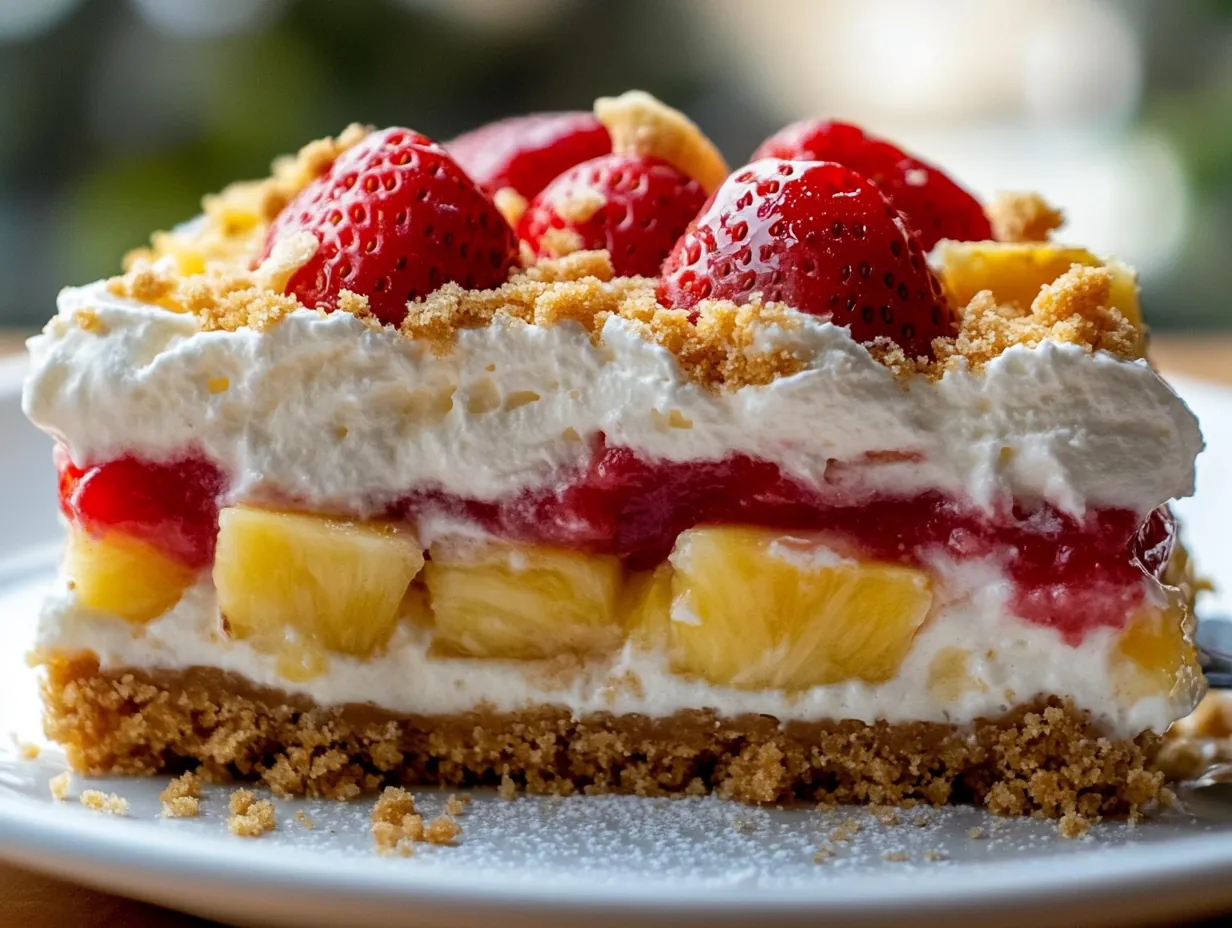
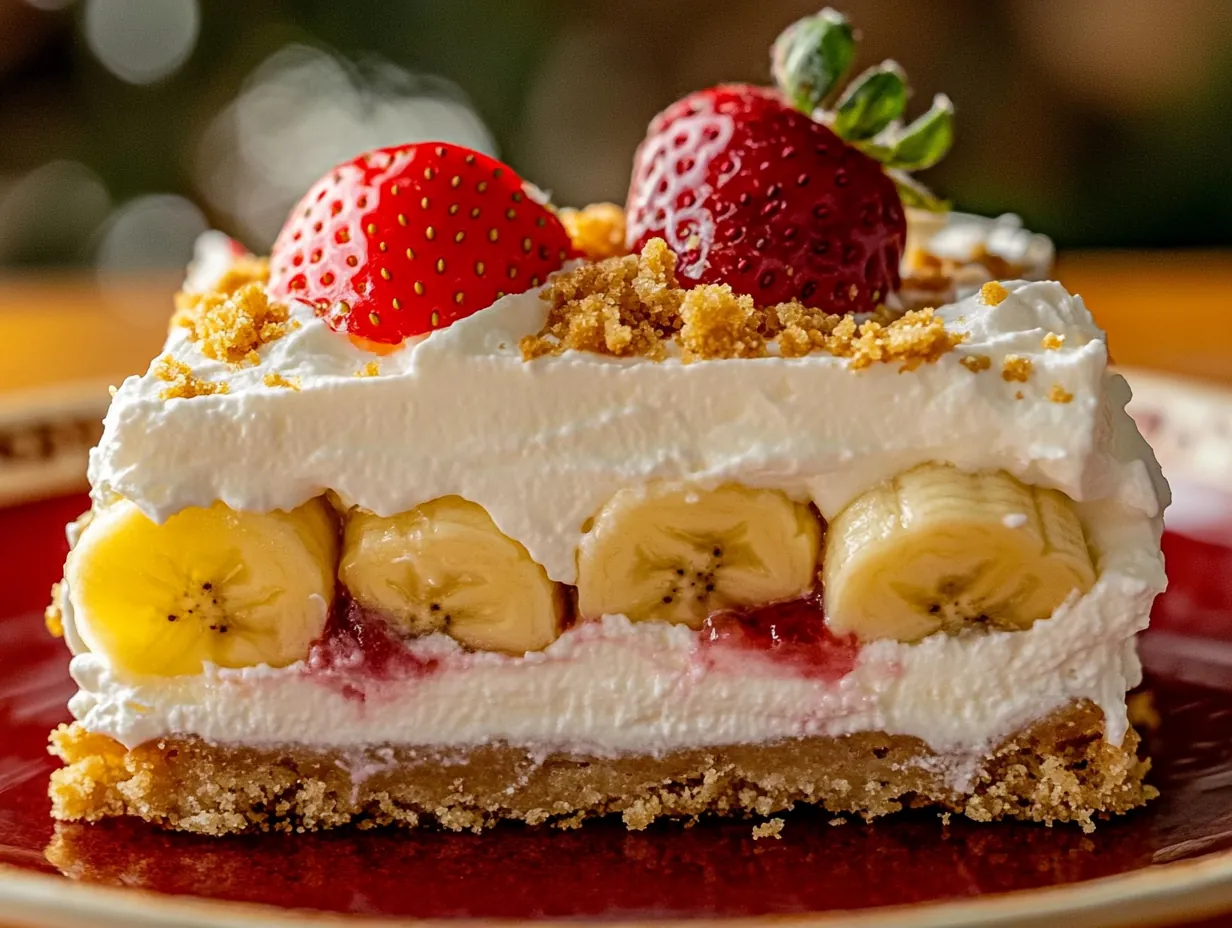
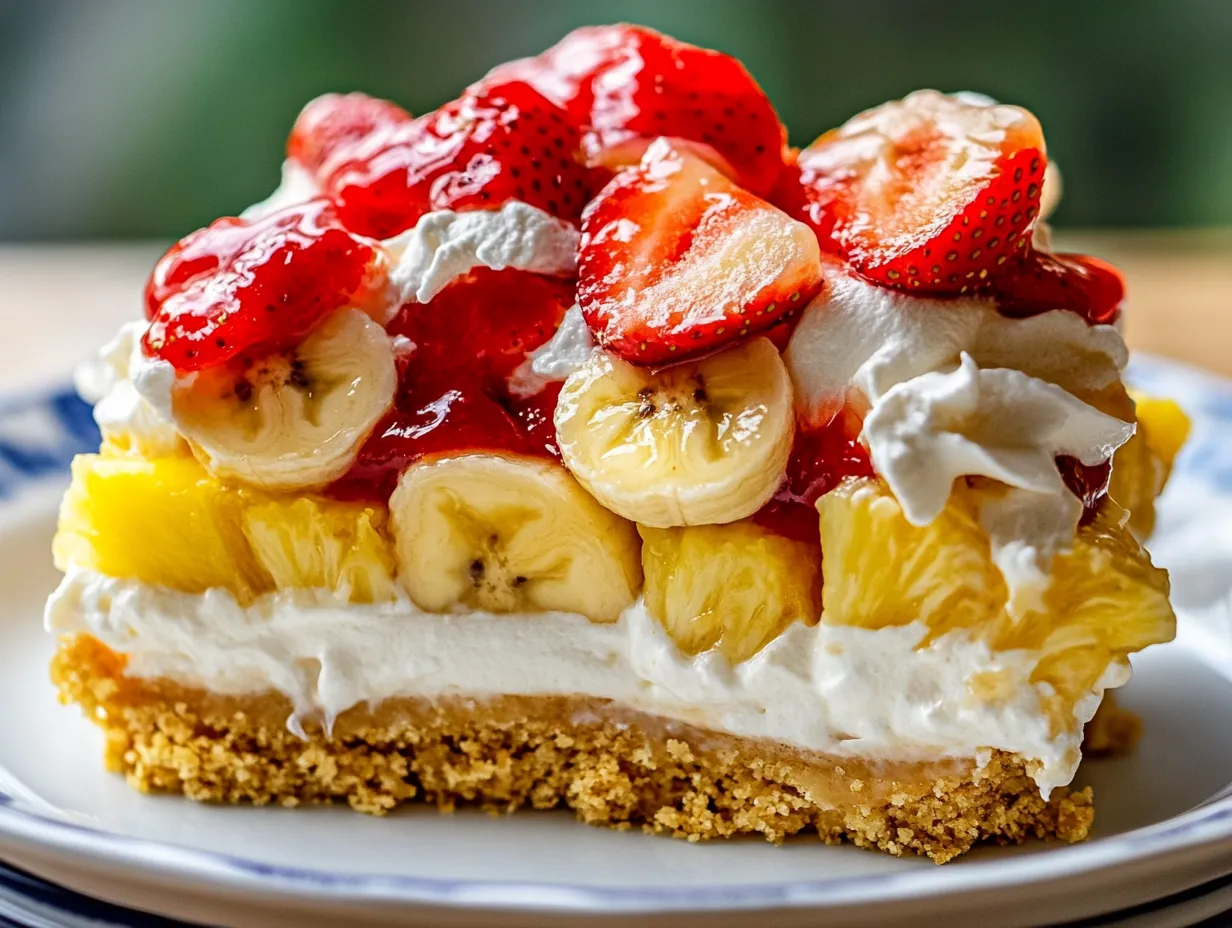
- Prepare the Crust: In a bowl, mix graham cracker crumbs, melted butter, and sugar until evenly combined. The texture should resemble damp sand. Press the mixture firmly into a 9×13-inch glass dish, making sure it’s even and compact, especially in the corners. Chill in the refrigerator for 20–30 minutes until set.
- Make the Cream Layer: In a large mixing bowl, beat the softened cream cheese until completely smooth and free of lumps. Add powdered sugar and vanilla extract, then mix until creamy. Gently fold in the whipped topping until light and fluffy.
- Assemble the Base Layers: Spread the cream mixture evenly over the chilled crust. Take your time to smooth it out without disturbing the crust underneath. Use an offset spatula for the best, most gentle spreading.
- Add the Banana Layer: Arrange banana slices along the edges of the dish first. This creates that pretty layered look when the dessert is sliced. Then spread the remaining slices evenly across the surface.
- Add Pineapple Layer: Spread the well-drained crushed pineapple evenly over the bananas. Avoid pressing too hard to keep layers intact. Distribute the pineapple from edge to edge for consistent flavor.
- Add Strawberry Layer: Spoon and spread the strawberry filling over the pineapple layer. Keep it even but do not overmix the layers. A gentle hand helps maintain those beautiful distinct layers.
- Top It Off: Spread a thick layer of whipped topping across the entire dessert. Drizzle generously with chocolate syrup. Sprinkle chopped nuts, and place cherries evenly across the top.
- Chill and Set: Refrigerate for at least 4 hours. Overnight is best for clean slices and fully set layers. This chilling time is essential for the dessert to firm up properly.
- Serve Cold: Slice into squares and serve chilled. Use a clean knife between cuts for neat layers. A warm knife can also help create very clean, sharp slices.
Creative Twists and Savory Pairings for Your Dessert
This no-bake banana split dessert is wonderfully versatile. It easily adapts to your taste preferences and what you have on hand. Feel free to experiment and make this recipe truly your own. These ideas will spark your culinary imagination.
My Creative Touch:
Tropical Paradise Version: For a vibrant, sunny twist, swap out the strawberry layer. Use a mango puree or finely diced fresh kiwi instead. You could also add a sprinkle of toasted coconut flakes on top. This variation transports you straight to a beach vacation. It offers a bright, exotic flavor profile that is utterly refreshing.
Chocolate Lover's Dream: Elevate the chocolate experience by adding a layer of chocolate pudding. Spread it thinly over the pineapple layer before the strawberry. You could also mix mini chocolate chips into the cream cheese layer. A chocolate crust is another delightful option. This makes the dessert extra rich and decadent.
Gourmet Pairings:
Beverage Pairing: Serve this delightful dessert with a chilled glass of sparkling cider. The crisp, effervescent bubbles and apple notes cut through the richness. It provides a refreshing contrast to the sweet fruit and cream. It is a light and elegant choice for any occasion.
Side Dish Pairing: While this is a complete dessert, consider serving it after a light summer salad. A simple mixed green salad with a citrus vinaigrette is perfect. The fresh, tangy greens prepare your palate for the sweet indulgence to come. It creates a balanced meal experience.
Keeping Your No-Bake Banana Split Dessert Fresh
Proper storage ensures your delicious no-bake banana split dessert stays fresh and tasty for days. This makes it a fantastic make-ahead option for busy hosts. Follow these simple guidelines to preserve its delightful quality.
Storage:
Store leftover dessert tightly covered with plastic wrap in the refrigerator. It will remain fresh and enjoyable for up to 3-4 days. The bananas might brown slightly over time. This does not affect the taste. Keep it away from strong-smelling foods in your fridge.
Freezing:
While technically possible, freezing is not recommended for this dessert. The whipped topping and cream cheese layers can separate. The bananas also tend to become very mushy and watery upon thawing. This significantly alters the dessert's desirable texture. It is best enjoyed fresh or simply refrigerated.
Reheating:
This is a chilled dessert and should not be reheated. It is designed to be served cold. Reheating would melt the cream layers and ruin the crispness of the crust. Simply take it from the refrigerator and serve directly.
Answering Your Sweetest No-Bake Banana Split Questions
You might have a few questions as you embark on making this delightful no-bake dessert. I am here to help ensure your experience is smooth and successful. Here are some common inquiries and my best advice.
Can I use fresh fruit instead of canned pineapple and strawberry pie filling?
Yes, absolutely! For fresh pineapple, dice it very finely and drain it meticulously to remove excess juice. For strawberries, mash fresh berries with a little sugar. Ensure they are thick enough for layering. This offers a vibrant, fresher flavor. Just be aware that fresh fruit can release more liquid.
How do I prevent the graham cracker crust from getting soggy?
The key is thorough chilling of the crust before adding the cream layer. A firm, cold crust acts as a better barrier. Also, ensure your crushed pineapple is extremely well-drained. Excess moisture from fruit layers is the main culprit for a soggy bottom. Do not skip the chilling steps.
Can I make this dessert ahead of time for a party?
This dessert is fantastic for making ahead. In fact, chilling it overnight is highly recommended. It allows all the layers to set beautifully. This results in cleaner slices. Just add the final chocolate drizzle, nuts, and cherries right before serving for the freshest look.
I truly hope this no-bake banana split dessert brings as much joy to your table as it does to mine. There is something truly special about a homemade treat. It carries the warmth of your kitchen and the love you put into it. This recipe is a perfect example of that simple, comforting magic. It is designed to create happy memories.
Do not worry about making it absolutely perfect. The beauty of home cooking lies in its charming imperfections. Each scoop will still be bursting with incredible flavor. It will bring smiles to everyone who tries it. This dessert truly is a delightful creation. It embodies pure, unadulterated happiness in every layer.
I would absolutely love to hear about your own experiences with this recipe. Share your banana split dessert creations with me. Tell me about the memories you make while enjoying it with your loved ones. Happy baking, or should I say, happy chilling, my friends! Enjoy every sweet, creamy, fruity bite and the warmth it brings.
Reader Reviews
This was a huge hit at our family get-together! So simple to throw together and tasted exactly like the banana splits I remember from childhood.
Loved how quick this came together. I added a drizzle of hot fudge and it was perfection. Great for a weeknight treat!
Such a fun and easy dessert! My kids helped assemble it and they had a blast. Delicious and a definite keeper.
A really solid no-bake option. The banana flavor came through nicely and it satisfied my sweet craving without much effort.
This recipe delivered on the nostalgia factor! It was so refreshing and I appreciated that I didn't have to turn on the oven.
Leave a Review